
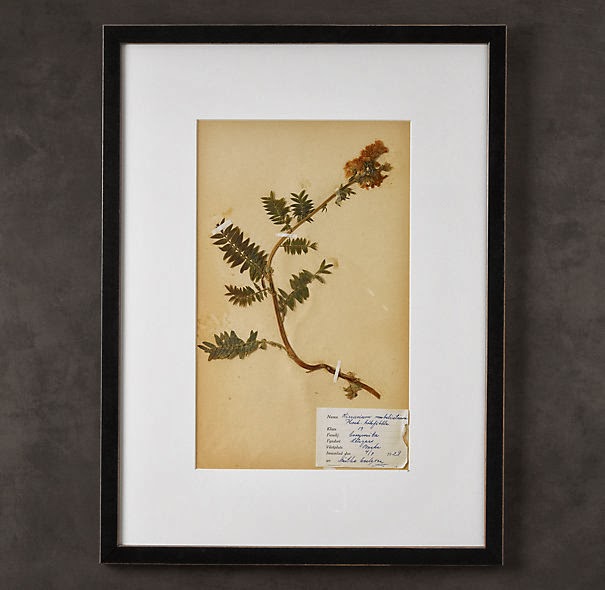
I love pressed botanical prints. They’re a lovely way to display flowers that your kids have picked for you or from a bouquet that was given to you from your love.
For this project, you’re going to need:
* picture frames, mats optional
* dried flowers, instructions and beautiful pressed roses via here
* gel medium (or Mod Podge/glue), stitching is another option
* a small paintbrush
* Thick card stock or antique paper
* dried flowers, instructions and beautiful pressed roses via here
* gel medium (or Mod Podge/glue), stitching is another option
* a small paintbrush
* Thick card stock or antique paper

Step one: Cut your card stock or paper to the same size as the glass in your picture frame.
Step two: Assemble your flowers before gluing.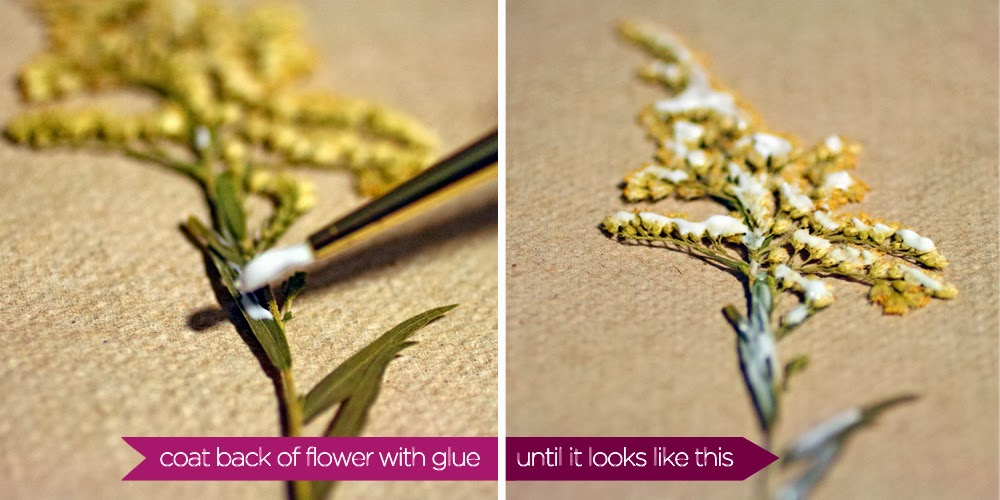
Step three: Plan the position of the flower before you glue. Use your small paint brush to put the adhesive on the back side of the flowers. It’s best to put the flowers on a paper towel to keep the glue from smudging. The paint brush gives great control, especially if you’re working with small flowers.

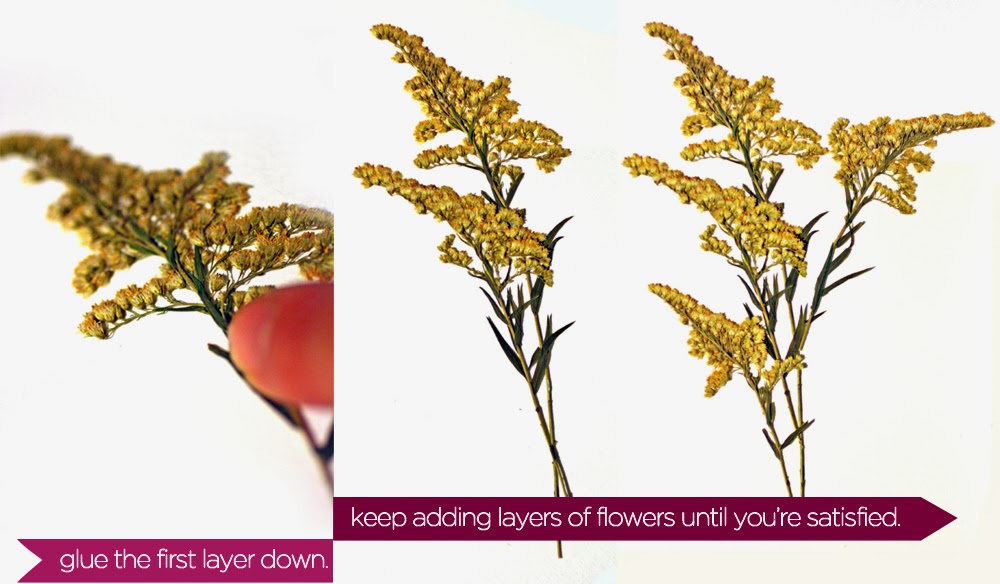
Four: Adhere flowers to card stock or paper, layer by layer. Press down on all areas of the flower after you’ve laid it on the card stock.

Five: Let the glue dry, then place flower inside its frame. You can write the species, date, and other information on a card to place inside the frame.
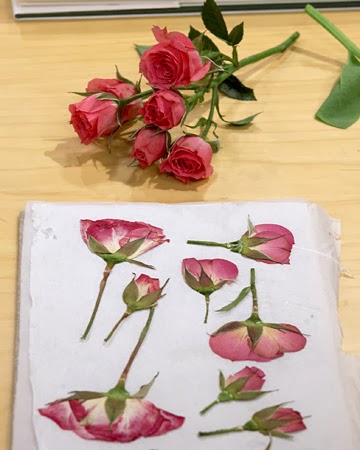
* Would love these impossibly beautiful roses framed
Hang up your frames and enjoy!
// Via here and here //
Bisous, B
If you would like help in creating a home you love, please contact me at Brenda@atelierdhautedesign.com
www.atelierdhautedesign.com

2 Comments
Ther's something very special about pressed flowers especially if they were from a bouquet. The roses would look gorgeous framed.
http://missbbobochic.blogspot.co.uk/
What a wonderful idea. Pressed flowers are so pretty.